Terraform部署容器服務Kubernetes集群及WordPress應用
本教程介紹了如何通過Terraform在VPC環境下部署一個阿里云容器服務Kubernetes集群,并在該集群之上,部署一個WordPress樣例應用。
前提條件
在使用本教程之前,請確保完成以下準備工作:
請確保您已開通阿里云容器服務,參見容器服務Kubernetes版。
使用Terraform部署容器服務Kubernetes集群及WordPress應用,您需要一個阿里云賬號和訪問密鑰(AccessKey)。 請在阿里云控制臺中的AccessKey管理頁面上創建和查看您的AccessKey。
安裝Terraform,請參見在本地安裝和配置Terraform。
步驟一:下載容器服務Kubernetes的Terraform模板
您可以從GitHub上下載創建Kubernetes集群的Terraform模板(模板下載地址),模板中包含以下文件:
main.tf
Terraform主文件。定義了將要部署的資源。本模板加入了條件判斷,可實現對已有網絡資源的引用和多個Kubernetes集群的同時創建。該文件定義了以下資源:
可用地域
定義了資源將要被創建在哪個地域里。
provider "alicloud" {
  access_key = "${var.alicloud_access_key}"
  secret_key = "${var.alicloud_secret_key}"
  region = "${var.region}"
}

data "alicloud_zones" "default" {
  available_instance_type = data.alicloud_instance_types.default.instance_types[0].id
}
實例規格
data "alicloud_instance_types" "default" {
  cpu_core_count = var.cpu_core_count
  memory_size    = var.memory_size
}
專有網絡
指定vpc_id可使用已有VPC。
resource "alicloud_vpc" "vpc" {
  count      = var.vpc_id == "" ? 1 : 0
  cidr_block = var.vpc_cidr
  name       = var.vpc_name == "" ? var.example_name : var.vpc_name
}
交換機
指定vswitch_ids可使用已有交換機。
resource "alicloud_vswitch" "vswitches" {
  count             = length(var.vswitch_ids) > 0 ? 0 : length(var.vswitch_cidrs)
  vpc_id            = var.vpc_id == "" ? join("", alicloud_vpc.vpc.*.id) : var.vpc_id
  cidr_block        = element(var.vswitch_cidrs, count.index)
  availability_zone = data.alicloud_zones.default.zones[count.index % length(data.alicloud_zones.default.zones)]["id"]
  name = var.vswitch_name_prefix == "" ? format(
    "%s-%s",
    var.example_name,
    format(var.number_format, count.index + 1),
    ) : format(
    "%s-%s",
    var.vswitch_name_prefix,
    format(var.number_format, count.index + 1),
  )
}
NAT網關
指定new_nat_gateway來決定是否要為模板中定義的 VPC 自動創建NAT網關,以保證Kubernetes集群成功創建。
resource "alicloud_nat_gateway" "default" {
  count  = var.new_nat_gateway == "true" ? 1 : 0
  vpc_id = var.vpc_id == "" ? join("", alicloud_vpc.vpc.*.id) : var.vpc_id
  name   = var.example_name
}
彈性網卡
resource "alicloud_eip" "default" {
  count     = var.new_nat_gateway == "true" ? 1 : 0
  bandwidth = 10
}
綁定彈性網卡
resource "alicloud_eip_association" "default" {
  count         = var.new_nat_gateway == "true" ? 1 : 0
  allocation_id = alicloud_eip.default[0].id
  instance_id   = alicloud_nat_gateway.default[0].id
}
添加SNAT條目
在模板中定義的NAT網關下自動添加SNAT條目來保證Kubernetes集群成功創建。
resource "alicloud_snat_entry" "default" {
  count         = var.new_nat_gateway == "false" ? 0 : length(var.vswitch_ids) > 0 ? length(var.vswitch_ids) : length(var.vswitch_cidrs)
  snat_table_id = alicloud_nat_gateway.default[0].snat_table_ids
  source_vswitch_id = length(var.vswitch_ids) > 0 ? split(",", join(",", var.vswitch_ids))[count.index % length(split(",", join(",", var.vswitch_ids)))] : length(var.vswitch_cidrs) < 1 ? "" : split(",", join(",", alicloud_vswitch.vswitches.*.id))[count.index % length(split(",", join(",", alicloud_vswitch.vswitches.*.id)))]
  snat_ip = alicloud_eip.default[0].ip_address
}
容器服務Kubernetes集群
改變k8s_number的值可同時創建多個Kubernetes集群。
resource "alicloud_cs_kubernetes" "k8s" { count = var.k8s_number name = var.k8s_name_prefix == "" ? format( "%s-%s", var.example_name, format(var.number_format, count.index + 1), ) : format( "%s-%s", var.k8s_name_prefix, format(var.number_format, count.index + 1), ) vswitch_ids = [length(var.vswitch_ids) > 0 ? split(",", join(",", var.vswitch_ids))[count.index % length(split(",", join(",", var.vswitch_ids)))] : length(var.vswitch_cidrs) < 1 ? "" : split(",", join(",", alicloud_vswitch.vswitches.*.id))[count.index % length(split(",", join(",", alicloud_vswitch.vswitches.*.id)))]] new_nat_gateway = false master_instance_types = [var.master_instance_type == "" ? data.alicloud_instance_types.default.instance_types[0].id : var.master_instance_type] worker_instance_types = [var.worker_instance_type == "" ? data.alicloud_instance_types.default.instance_types[0].id : var.worker_instance_type] worker_numbers = [var.k8s_worker_number] master_disk_category = var.master_disk_category worker_disk_category = var.worker_disk_category master_disk_size = var.master_disk_size worker_disk_size = var.master_disk_size password = var.ecs_password pod_cidr = var.k8s_pod_cidr service_cidr = var.k8s_service_cidr enable_ssh = true install_cloud_monitor = true depends_on = [alicloud_snat_entry.default] }說明指定
kube_config = "~/.kube/config"可在Kubernetes集群創建完成后將Kube Config內容自動下載并存放在文件~/.kube/config中。
outputs.tf
該文件定義了輸出參數。作為執行的一部分而創建的資源會生成這些輸出參數。和ROS模板指定的輸出參數類似。例如,該模板將部署一個Kubernetes集群。以下輸出參數將提供集群ID和其他資源參數。
// Output VPC
output "vpc_id" {
  description = "The ID of the VPC."
  value       = alicloud_cs_kubernetes.k8s[0].vpc_id
}

output "vswitch_ids" {
  description = "List ID of the VSwitches."
  value       = [alicloud_cs_kubernetes.k8s.*.vswitch_ids]
}

output "nat_gateway_id" {
  value = alicloud_cs_kubernetes.k8s[0].nat_gateway_id
}

// Output kubernetes resource
output "cluster_id" {
  description = "ID of the kunernetes cluster."
  value       = [alicloud_cs_kubernetes.k8s.*.id]
}

output "security_group_id" {
  description = "ID of the Security Group used to deploy kubernetes cluster."
  value       = alicloud_cs_kubernetes.k8s[0].security_group_id
}

output "worker_nodes" {
  description = "List worker nodes of cluster."
  value       = [alicloud_cs_kubernetes.k8s.*.worker_nodes]
}

output "master_nodes" {
  description = "List master nodes of cluster."
  value       = [alicloud_cs_kubernetes.k8s.*.master_nodes]
}
variables.tf
該文件包含可傳遞到main.tf的變量,可幫助您自定義環境。
# common variables
variable "availability_zone" {
  description = "The available zone to launch ecs instance and other resources."
  default     = ""
}

variable "number_format" {
  description = "The number format used to output."
  default     = "%02d"
}

variable "example_name" {
  default = "tf-example-kubernetes"
}

# Instance types variables
variable "cpu_core_count" {
  description = "CPU core count is used to fetch instance types."
  default     = 2
}

variable "memory_size" {
  description = "Memory size used to fetch instance types."
  default     = 4
}

# VPC variables
variable "vpc_name" {
  description = "The vpc name used to create a new vpc when 'vpc_id' is not specified. Default to variable `example_name`"
  default     = ""
}

variable "vpc_id" {
  description = "A existing vpc id used to create several vswitches and other resources."
  default     = ""
}

variable "vpc_cidr" {
  description = "The cidr block used to launch a new vpc when 'vpc_id' is not specified."
  default     = "10.1.0.0/21"
}

# VSwitch variables
variable "vswitch_name_prefix" {
  description = "The vswitch name prefix used to create several new vswitches. Default to variable `example_name`"
  default     = ""
}

variable "vswitch_ids" {
  description = "List of existing vswitch id."
  type        = list(string)
  default     = []
}

variable "vswitch_cidrs" {
  description = "List of cidr blocks used to create several new vswitches when 'vswitch_ids' is not specified."
  type        = list(string)
  default     = ["10.1.2.0/24"]
}

variable "new_nat_gateway" {
  description = "Whether to create a new nat gateway. In this template, a new nat gateway will create a nat gateway, eip and server snat entries."
  default     = "true"
}

# Cluster nodes variables
variable "master_instance_type" {
  description = "The ecs instance type used to launch master nodes. Default from instance typs datasource."
  default     = ""
}

variable "worker_instance_type" {
  description = "The ecs instance type used to launch worker nodes. Default from instance typs datasource."
  default     = ""
}

variable "master_disk_category" {
  description = "The system disk category used to launch one or more master nodes."
  default     = "cloud_efficiency"
}

variable "worker_disk_category" {
  description = "The system disk category used to launch one or more worker nodes."
  default     = "cloud_efficiency"
}

variable "master_disk_size" {
  description = "The system disk size used to launch one or more master nodes."
  default     = "40"
}

variable "worker_disk_size" {
  description = "The system disk size used to launch one or more worker nodes."
  default     = "40"
}

variable "ecs_password" {
  description = "The password of instance."
  default     = "Abc12345"
}

variable "k8s_number" {
  description = "The number of kubernetes cluster."
  default     = 1
}

variable "k8s_worker_number" {
  description = "The number of worker nodes in each kubernetes cluster."
  default     = 3
}

variable "k8s_name_prefix" {
  description = "The name prefix used to create several kubernetes clusters. Default to variable `example_name`"
  default     = ""
}

variable "k8s_pod_cidr" {
  description = "The kubernetes pod cidr block. It cannot be equals to vpc's or vswitch's and cannot be in them."
  default     = "172.20.0.0/16"
}

variable "k8s_service_cidr" {
  description = "The kubernetes service cidr block. It cannot be equals to vpc's or vswitch's or pod's and cannot be in them."
  default     = "172.21.0.0/20"
}
步驟二:執行Kubernetes Terraform腳本
在存放以上文件的路徑,運行terraform init命令,初始化工作空間。
$ terraform init Initializing the backend... Initializing provider plugins... - Checking for available provider plugins... - Downloading plugin for provider "alicloud" (hashicorp/alicloud) 1.62.0... The following providers do not have any version constraints in configuration, so the latest version was installed. To prevent automatic upgrades to new major versions that may contain breaking changes, it is recommended to add version = "..." constraints to the corresponding provider blocks in configuration, with the constraint strings suggested below. * provider.alicloud: version = "~> 1.62" Terraform has been successfully initialized!運行terraform apply 命令,開始創建Kubernetes集群。
$ terraform apply

data.alicloud_instance_types.default: Refreshing state...
data.alicloud_zones.default: Refreshing state...

An execution plan has been generated and is shown below.
Resource actions are indicated with the following symbols:
  + create

Terraform will perform the following actions:
...

Plan: 7 to add, 0 to change, 0 to destroy.

Do you want to perform these actions?
  Terraform will perform the actions described above.
  Only 'yes' will be accepted to approve.

  Enter a value: yes

alicloud_vpc.vpc: Creating...
...

Apply complete! Resources: 7 added, 0 changed, 0 destroyed.

Outputs:

cluster_id = [
    c0f2e04c77e234******
]
......
vswitch_ids = [
    vsw-bp1c3hfcd6l80izqc3tbx
]
terraform apply命令執行完畢后,輸出集群ID和其他參數。除此之外,將Kubernetes的Kube Config文件存放在了目錄 ~/.kube 下。
您現在可以在容器服務控制臺查看通過terraform創建的Kubernetes集群,查看集群、節點、日志和容器等信息。
步驟三:下載WordPress的Terraform模板
在創建好Kubernetes并完成了Kube Config的下載后,接下來就可以在Kubernetes上部署WordPress。 您可以從GitHub上下載創建WordPress的 Terraform模板(模板下載地址,模板中定義了創建WordPress的相關資源和配置,幫助您完成在Kubernetes集群的快速搭建WordPress。更多 Terraform Kubernetes的操作可參考Terraform官網的 Kubernetes 文檔介紹。
模板中包含以下文件:
localvolumes.tf
定義存儲MySQL持久化數據的Persistent Volume。
resource "kubernetes_persistent_volume" "mysql" {
  metadata {
    name = "local-pv-mysql"
    labels {
      type = "local"
    }
  }
  spec {
    capacity {
      storage = "20Gi"
    }
    access_modes = ["ReadWriteOnce"]
    persistent_volume_source {
      host_path {
        path = "/tmp/data/pv-mysql"
      }
    }
  }
}
mysql.tf
創建MySQL密碼憑證Secret,并部署MySQL。
secret
resource "kubernetes_secret" "mysql" {
  metadata {
    name = "mysql-pass"
  }

  data {
    password = "${var.mysql_password}"
  }
}
Deployment
resource "kubernetes_service" "mysql" {
  metadata {
    name = "wordpress-mysql"
    labels {
      app = "wordpress"
    }
  }
  spec {
    port {
      port = 3306
    }
    selector {
      app = "wordpress"
      tier = "${kubernetes_replication_controller.mysql.spec.0.selector.tier}"
    }
    cluster_ip = "None"
  }
}

resource "kubernetes_replication_controller" "mysql" {
  metadata {
    name = "wordpress-mysql"
    labels {
      app = "wordpress"
    }
  }
  spec {
    selector {
      app = "wordpress"
      tier = "mysql"
    }
    template {
      container {
        image = "mysql:${var.mysql_version}"
        name  = "mysql"

        env {
          name = "MYSQL_ROOT_PASSWORD"
          value_from {
            secret_key_ref {
              name = "${kubernetes_secret.mysql.metadata.0.name}"
              key = "password"
            }
          }
        }

        port {
          container_port = 3306
          name = "mysql"
        }

        volume_mount {
          name = "mysql-persistent-storage"
          mount_path = "/var/lib/mysql"
        }
      }

      volume {
        name = "mysql-persistent-storage"
        persistent_volume_claim {
          claim_name = "${kubernetes_persistent_volume_claim.mysql.metadata.0.name}"
        }
      }
    }
  }
}
wordpress.tf
部署WordPress。
resource "kubernetes_service" "wordpress" {
  metadata {
    name = "wordpress"
    labels {
      app = "wordpress"
    }
  }
  spec {
    port {
      port = 80
    }
    selector {
      app = "wordpress"
      tier = "${kubernetes_replication_controller.wordpress.spec.0.selector.tier}"
    }
    type = "LoadBalancer"
  }
}

resource "kubernetes_replication_controller" "wordpress" {
  metadata {
    name = "wordpress"
    labels {
      app = "wordpress"
    }
  }
  spec {
    selector {
      app = "wordpress"
      tier = "frontend"
    }
    template {
      container {
        image = "wordpress:${var.wordpress_version}-apache"
        name  = "wordpress"

        env {
          name = "WORDPRESS_DB_HOST"
          value = "wordpress-mysql"
        }
        env {
          name = "WORDPRESS_DB_PASSWORD"
          value_from {
            secret_key_ref {
              name = "${kubernetes_secret.mysql.metadata.0.name}"
              key = "password"
            }
          }
        }

        port {
          container_port = 80
          name = "wordpress"
        }

        volume_mount {
          name = "wordpress-persistent-storage"
          mount_path = "/var/www/html"
        }
      }

      volume {
        name = "wordpress-persistent-storage"
        persistent_volume_claim {
          claim_name = "${kubernetes_persistent_volume_claim.wordpress.metadata.0.name}"
        }
      }
    }
  }
}
outputs.tf
該文件定義了輸出參數。輸出Loadbalancer Public IP,借助該IP地址可直接訪問部署好的WordPress應用。
output "slb_ip" {
  value = "${kubernetes_service.wordpress.load_balancer_ingress.0.ip}"
}
variables.tf
該文件包含了部署MySQL和WordPress所依賴的參數。
variable "wordpress_version" {
  description = "The version of wordpress. Default to 4.7.3."
  default = "4.7.3"
}
variable "mysql_password" {
  description = "Please input mysql password."
}
variable "mysql_version" {
  description = "The version of mysql which wordpress used. Default to 5.6."
  default = "5.6"
}
步驟四:執行WordPress Terraform腳本
首先定位到您存放以上文件的目錄,如 /root/terraform/kuberneters-wordpress。運行terraform apply命令,開始在創建好的Kubernetes集群上部署MySQL和WordPress應用。值得注意的是,由于變量mysql_password在變量文件中沒有定義默認值,因此在執行命令時需要指定該參數值。
$ terraform apply -var 'mysql_password=Abc1234'

An execution plan has been generated and is shown below.
Resource actions are indicated with the following symbols:
  + create

Terraform will perform the following actions:
...

Plan: 9 to add, 0 to change, 0 to destroy.

Do you want to perform these actions?
  Terraform will perform the actions described above.
  Only 'yes' will be accepted to approve.

  Enter a value: yes

kubernetes_secret.mysql: Creating...
  data.%:                      "" => "1"
  data.password:               "<sensitive>" => "<sensitive>"
  metadata.#:                  "" => "1"
  metadata.0.generation:       "" => "<computed>"
  metadata.0.name:             "" => "mysql-pass"

......

Apply complete! Resources: 9 added, 0 changed, 0 destroyed.

Outputs:

slb_ip = 47.99.xx.xx
步驟五:訪問WordPress
根據負載均衡Public IP,在瀏覽器中輸入IP地址即可實現對部署好的WordPress直接訪問:
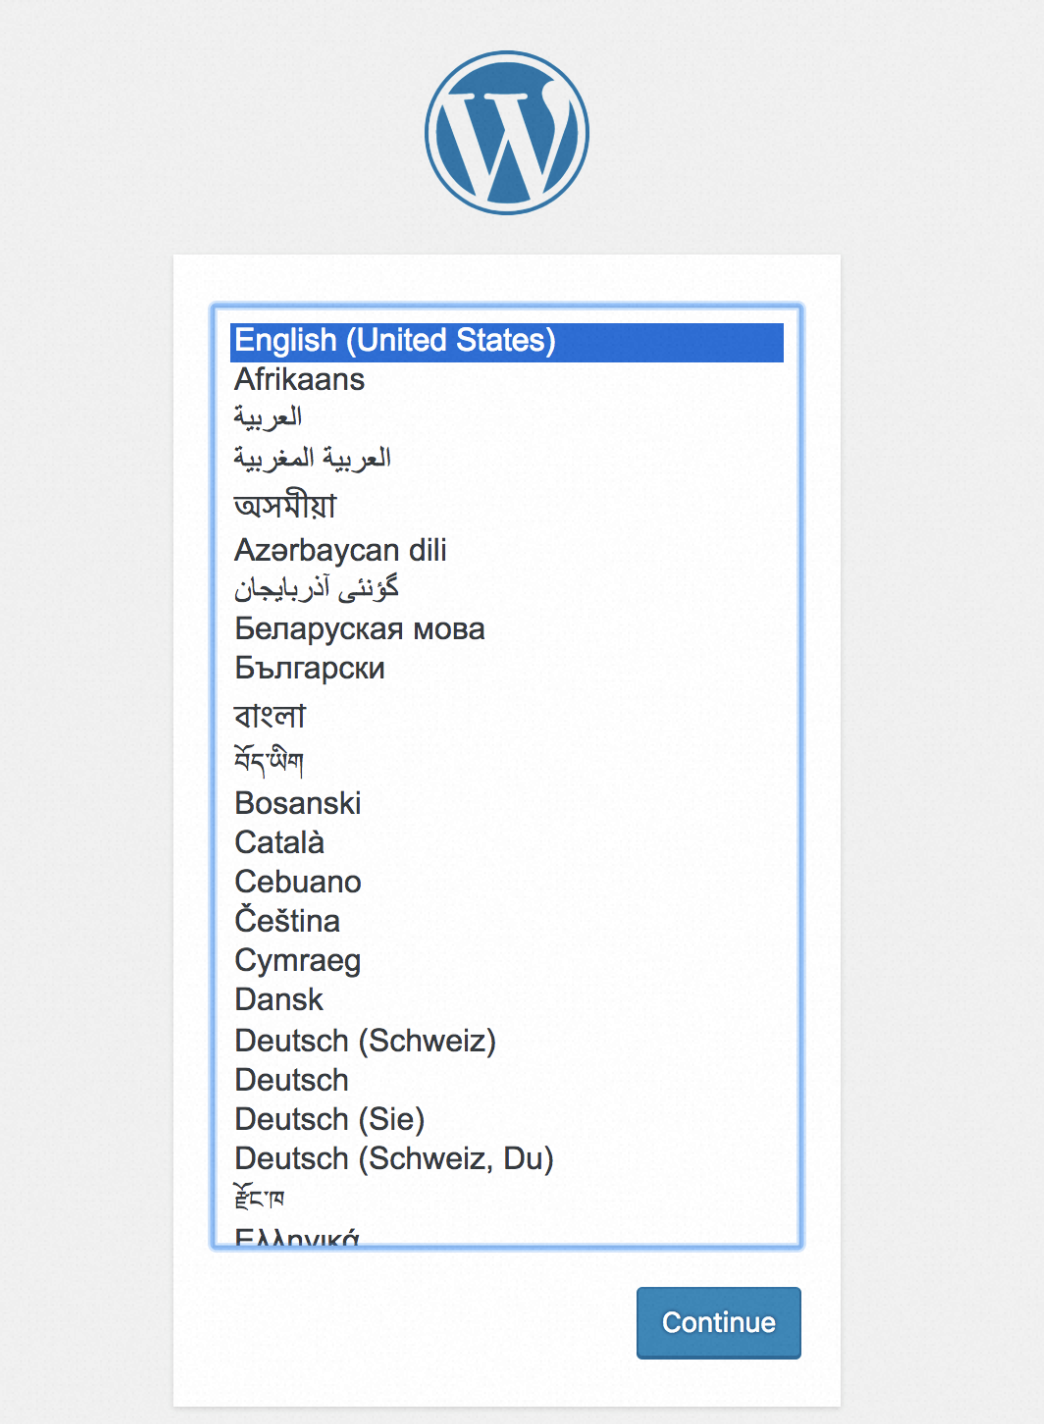
進入WordPress歡迎頁面,選擇語言,然后繼續配置。
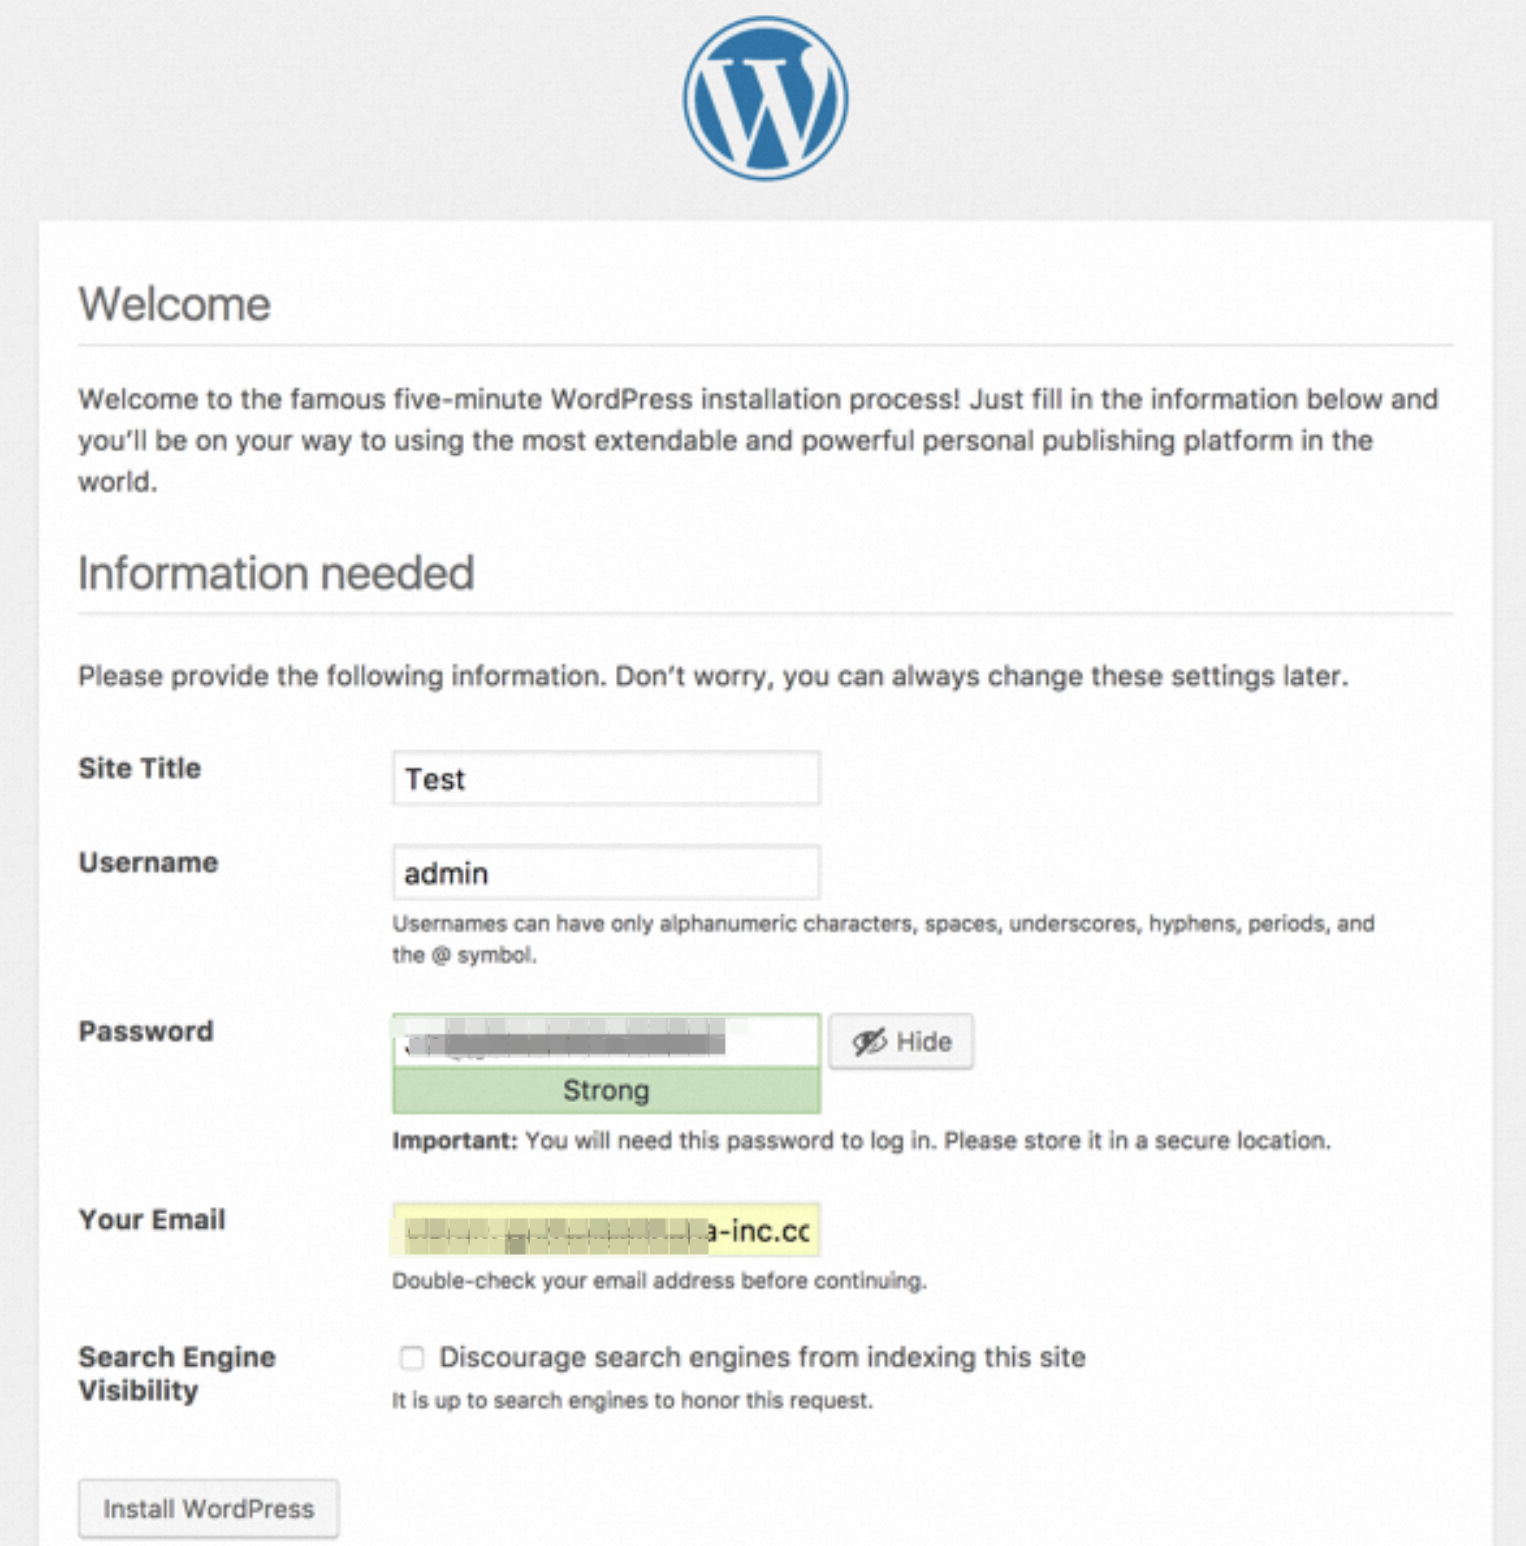
輸入站點名稱以及管理員的用戶名和密碼。選擇安裝WordPress。
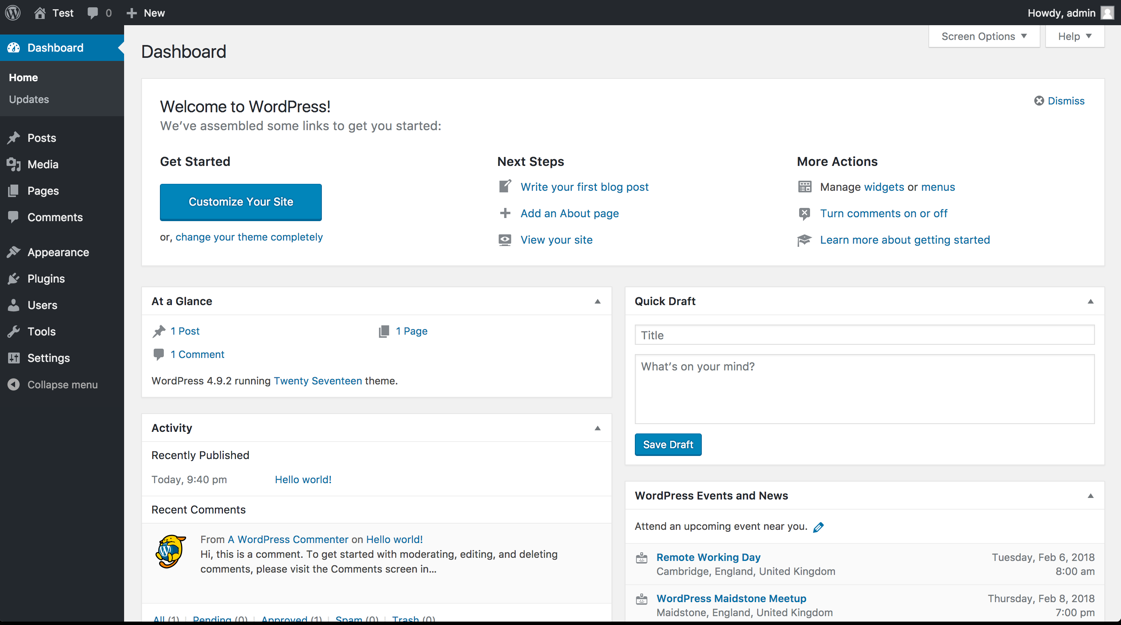
WordPress安裝完成后,單擊 登錄,輸入管理員的用戶名和密碼,進入WordPress應用。