本文介紹如何對Spring Config的配置項執行修改或者持久化等操作。
前提條件
接入應用:- Agent方式接入,與流量防護共用Agent,配置-Dahas.switch.agent.plugin.group.enabled=true。
- 應用配置SDK方式接入。具體操作,請參見使用SDK接入。
- 應用配置Spring Boot Starter方式接入。具體操作,請參見使用Spring Boot Starter接入。
背景信息
Spring Demo文件:
- UserController類對象:為@Value配置,用于測試@PostConstruct注解,此階段可識別持久化值,部分內容如下。
@RestController public class UserController { @Value("${project.name}") public String name; @Value("${user.ahas}") public boolean ahas; @Value("${user.number}") public int num; @Value("${destination}") public String destinationStr; @Autowired private Destination destination; @PostConstruct private void init(){ System.out.println("[UserController] init() value: "+ destinationStr +" , " + num + " , "+ ahas + " , " + name); System.out.println("[UserController] init() configuration: "+destination.getAvg()+" , " + destination.getMax() + " , "+ destination.getMin()); } } - DemoConfig類對象:為@Value配置,用于測試InitializingBean,afterPropertiesSet函數,初始化階段可讀取到持久化值,內容如下。
@Configuration public class DemoConfig implements InitializingBean { @Autowired private RequestProperties requestProperties; @Override public void afterPropertiesSet() { System.out.println("[DemoConfig] init() port: " + requestProperties.getPort() + " ,interface: " + requestProperties.getInter()); } } - RequestProperties類對象:為@ConfigurationProperties配置,Value模式。
@Component @ConfigurationProperties(value = "request") public class RequestProperties { private int port; private String inter; public int getPort() { return port; } public void setPort(int port) { this.port = port; } public String getInter() { return inter; } public void setInter(String inter) { this.inter = inter; } } - Destination類對象:為@ConfigurationProperties配置,Prefix模式。
@Component @ConfigurationProperties(prefix = "property.destination") public class Destination { private int max; private int min; private int avg; public int getMax() { return max; } public void setMax(int max) { this.max = max; } public int getMin() { return min; } public void setMin(int min) { this.min = min; } public int getAvg() { return avg; } public void setAvg(int avg) { this.avg = avg; } } - application.properties配置內容如下。
user.ahas=false
user.number=123

request.port=8081
request.inter=/hello

destination=sun

property.destination.max=300
property.destination.min=10
property.destination.avg=100
查看應用的開關配置
- 登錄 AHAS控制臺,然后在頁面左上角選擇地域。
- 在左側導航欄選擇功能開關,在應用列表頁面可看到已接入的應用。
- 單擊目標應用卡片,然后單擊分組模式。
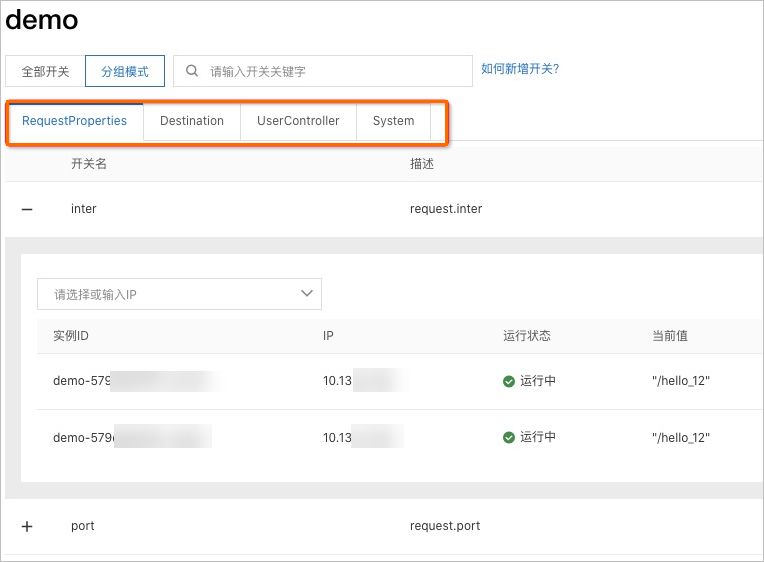
如下圖所示,可看到以分組形式展示的開關配置項。其中各分組名為識別出的類名,開關名為類中字段名,描述內容為@Value方式(注解中的內容)或者@ConfigurationProperties方式(Spring配置文件)的配置項,具體請參見背景信息中的介紹。
開關配置值的修改
對開關配置值的修改分為單機推送和全局推送兩種方式。單機推送的值不會持久化,僅當前微服務實例生命周期有效;全局推送方式會進行值持久化,微服務實例再次啟動后可看到持久化值。
單機推送
例如,對RequestProperties類對象中的port字段執行單機推送。
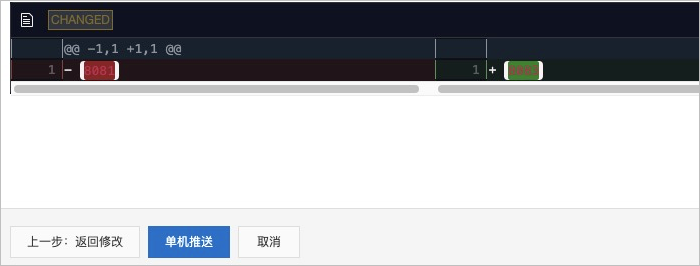
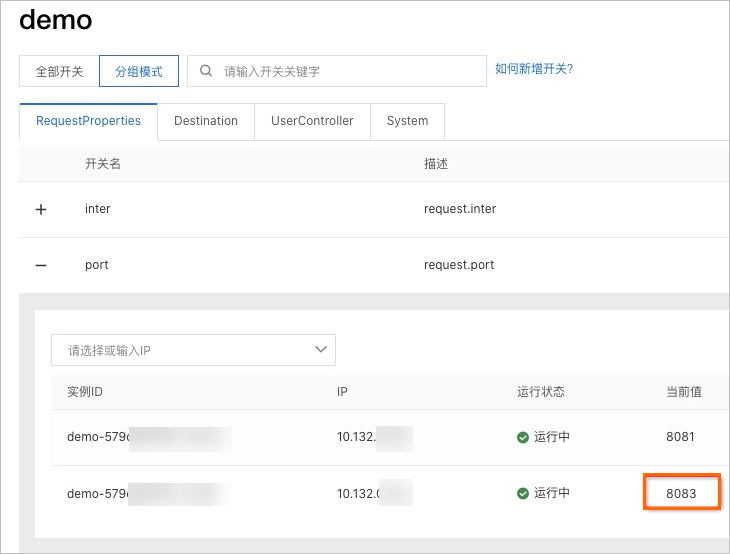
推送后應用中的deport字段的值已被修改,可在控制臺中查看推送結果。
同樣的方式,您還可以對UserController類對象中num的字段執行單機推送。您可在歷史記錄中查看歷史推送操作。具體操作,請參見查看歷史推送記錄。
全局推送
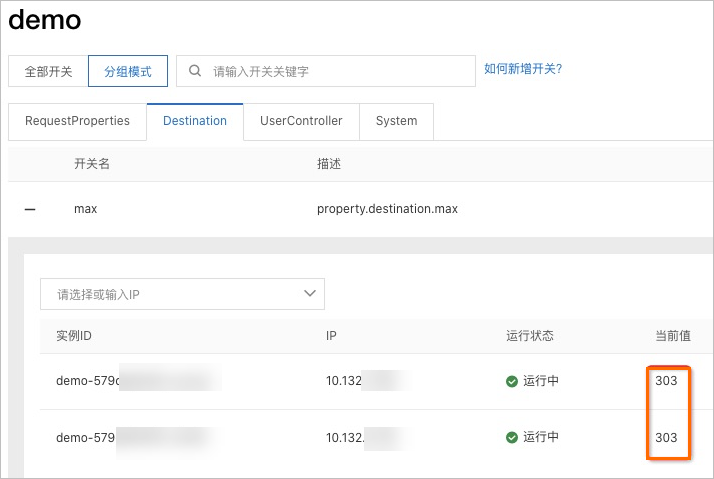
例如,對Destination類對象中的max字段執行全局推送。
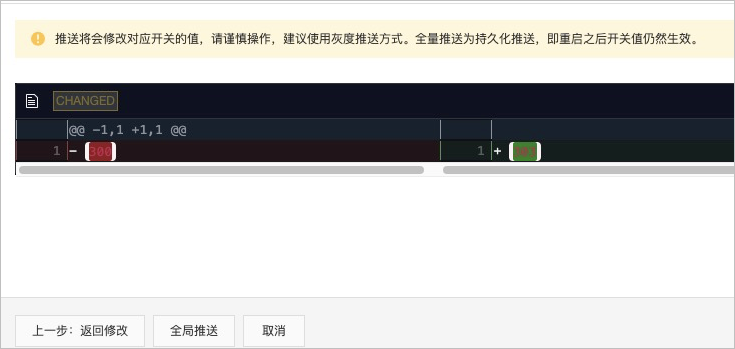
推送后應用中的max字段已被修改,同時數據已經持久化,可在控制臺中查看推送結果。
同樣的方式,您還可以對UserController類對象中的destinationStr字段執行全局推送。
開關配置值的持久化驗證
初始化階段
重啟應用,在InitializingBean,afterPropertiesSet函數初始化階段與@PostConstruct初始化階段均可被讀取到已持久化的值。
可通過測試Demo中的啟動日志查看,內容如下:

@ConfigurationProperties配置
在控制臺可看到通過全局推送方式推送的RequestProperties類對象的inter字段的配置項為持久化值,而通過單機推送的port字段的配置項仍為Spring原始配置內容。
@Value配置
在控制臺可看到通過全局推送方式推送的UserController類對象的destinationStr字段的配置項為持久化值,而通過單機推送的num字段的配置項仍為Spring原始配置內容。
查看歷史推送記錄
- 登錄 AHAS控制臺,然后在頁面左上角選擇地域。
- 在控制臺左側導航欄選擇功能開關,在應用列表頁面單擊目標應用的資源卡片。進入目標應用的開關列表頁面。
- 在開關列表頁面選擇System頁簽,然后單擊右上角的歷史記錄,可查看以往所有的推送記錄。
日志動態調整
測試樣例如下:
 private static final Random RANDOM = new Random();
 private static final Logger logger = LoggerFactory.getLogger("xx");

    @GetMapping("/hello")
    public ResponseEntity<String> hello(){
        int random = RANDOM.nextInt(100);
        logger.info("[SystemLog] ------------------- info : {} ",random);
        logger.debug("[SystemLog] ------------------- debug : {} ",random);
        logger.error("[SystemLog] ------------------- error : {} ",random);
        if(random < 30) {
            return new ResponseEntity<String>("BAD", HttpStatus.BAD_REQUEST);
        } else if(random > 50) {
            return new ResponseEntity<String>("BAD", HttpStatus.SERVICE_UNAVAILABLE);
        } else {
            return new ResponseEntity<String>("OK", HttpStatus.OK);
        }
}- 設置日志級別。
- 在開關列表頁面選擇System頁簽,然后在搜索框中搜索 SYSTEM_LOG_CONFIG 開關,即日志級別開關。
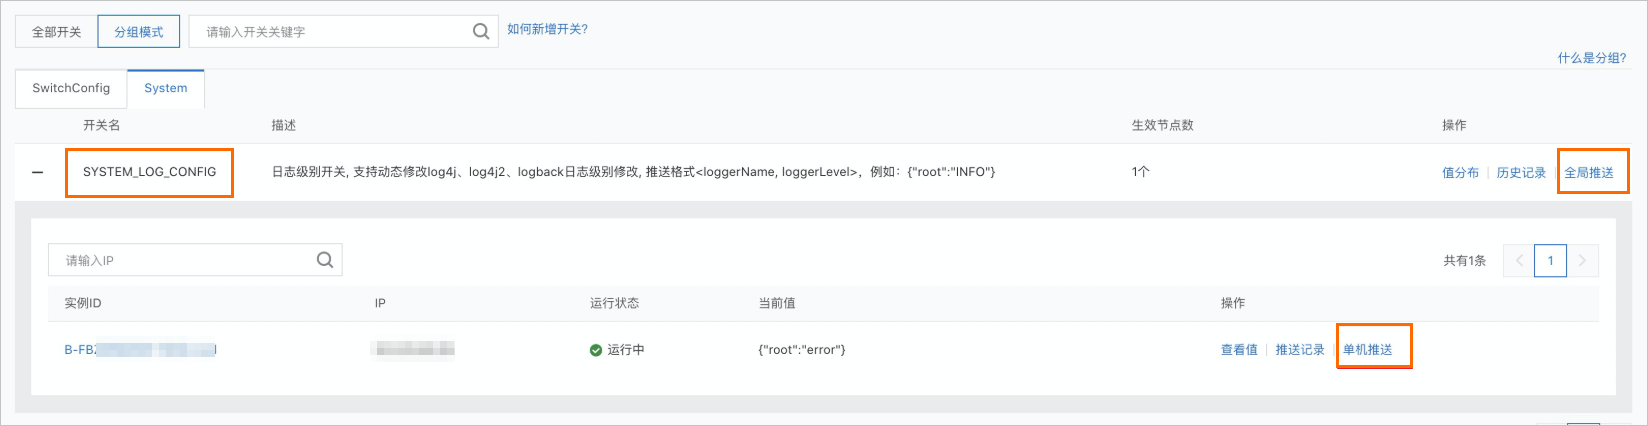
- 單擊操作列的單擊推送或右上角的全局推送,按照
<loggerName,loggerLevel>格式填寫日志運行的配置,然后單擊全局推送或單機推送。即可修改全部機器或是單臺機器的日志運行級別。這里以全局方式為例。推送值格式:Key為LoggerName,Value為日志級別。如需修改全局日志級別,LoggerName為root,如下所示。{ "root": "ERROR" }
- 在開關列表頁面選擇System頁簽,然后在搜索框中搜索 SYSTEM_LOG_CONFIG 開關,即日志級別開關。
- 查看日志打印情況。
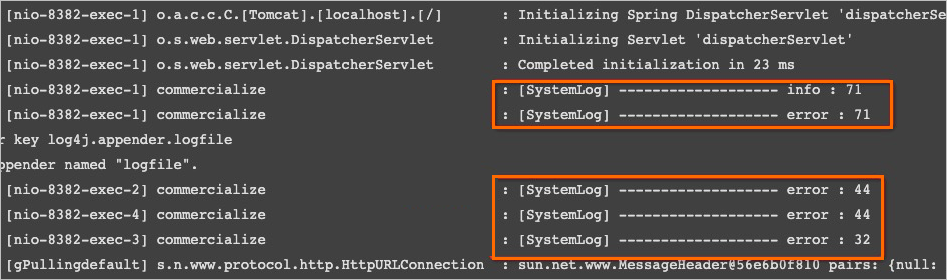
若將日志級別設為“DEBUG”,則日志打印結果如下:

灰度推送
您還可以在控制臺設置開關的灰度推送。
- 在目標開關的右上角單擊全局推送,進入開關推送頁面,在此頁面中編輯推送值。
- 單擊左下角的灰度推送,在彈出的灰度推送設置頁面,設置灰度批次,選擇是否多次暫停。然后單擊開始灰度。灰度推送成功后,在開關推送的進度列會顯示已完成。