阿里巴巴任務調度SchedulerX 2.0兼容開源ElasticJob任務接口,您無需修改代碼,即可將ElasticJob任務在SchedulerX 2.0平臺上進行托管。本文介紹在SchedulerX 2.0平臺上托管ElasticJob任務的優勢和方法。
背景信息
ElasticJob基于Quartz開發并且依賴ZooKeeper作為注冊中心,是一款輕量級、無中心化的分布式任務調度框架,已在多家公司投入使用,目前已經通過Apache開源。更多信息,請參見ElasticJob。
SchedulerX 2.0優勢
豐富的可視化能力
- 查看用戶大盤

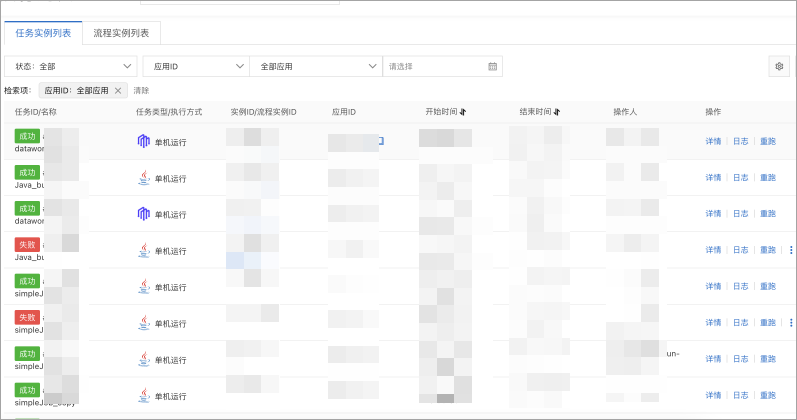
- 查看任務歷史記錄
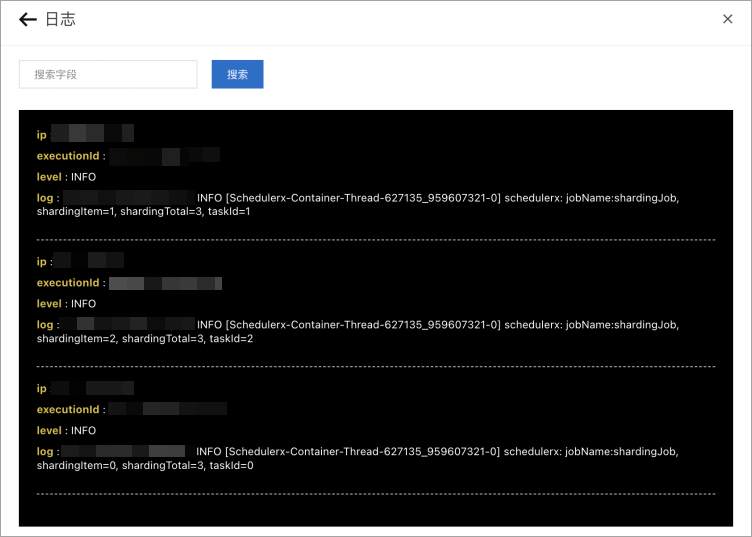
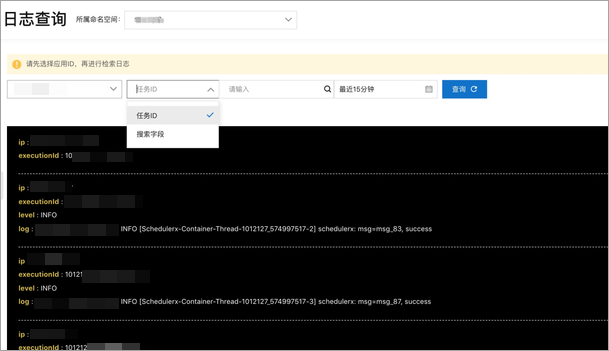
- 查看用戶運行日志
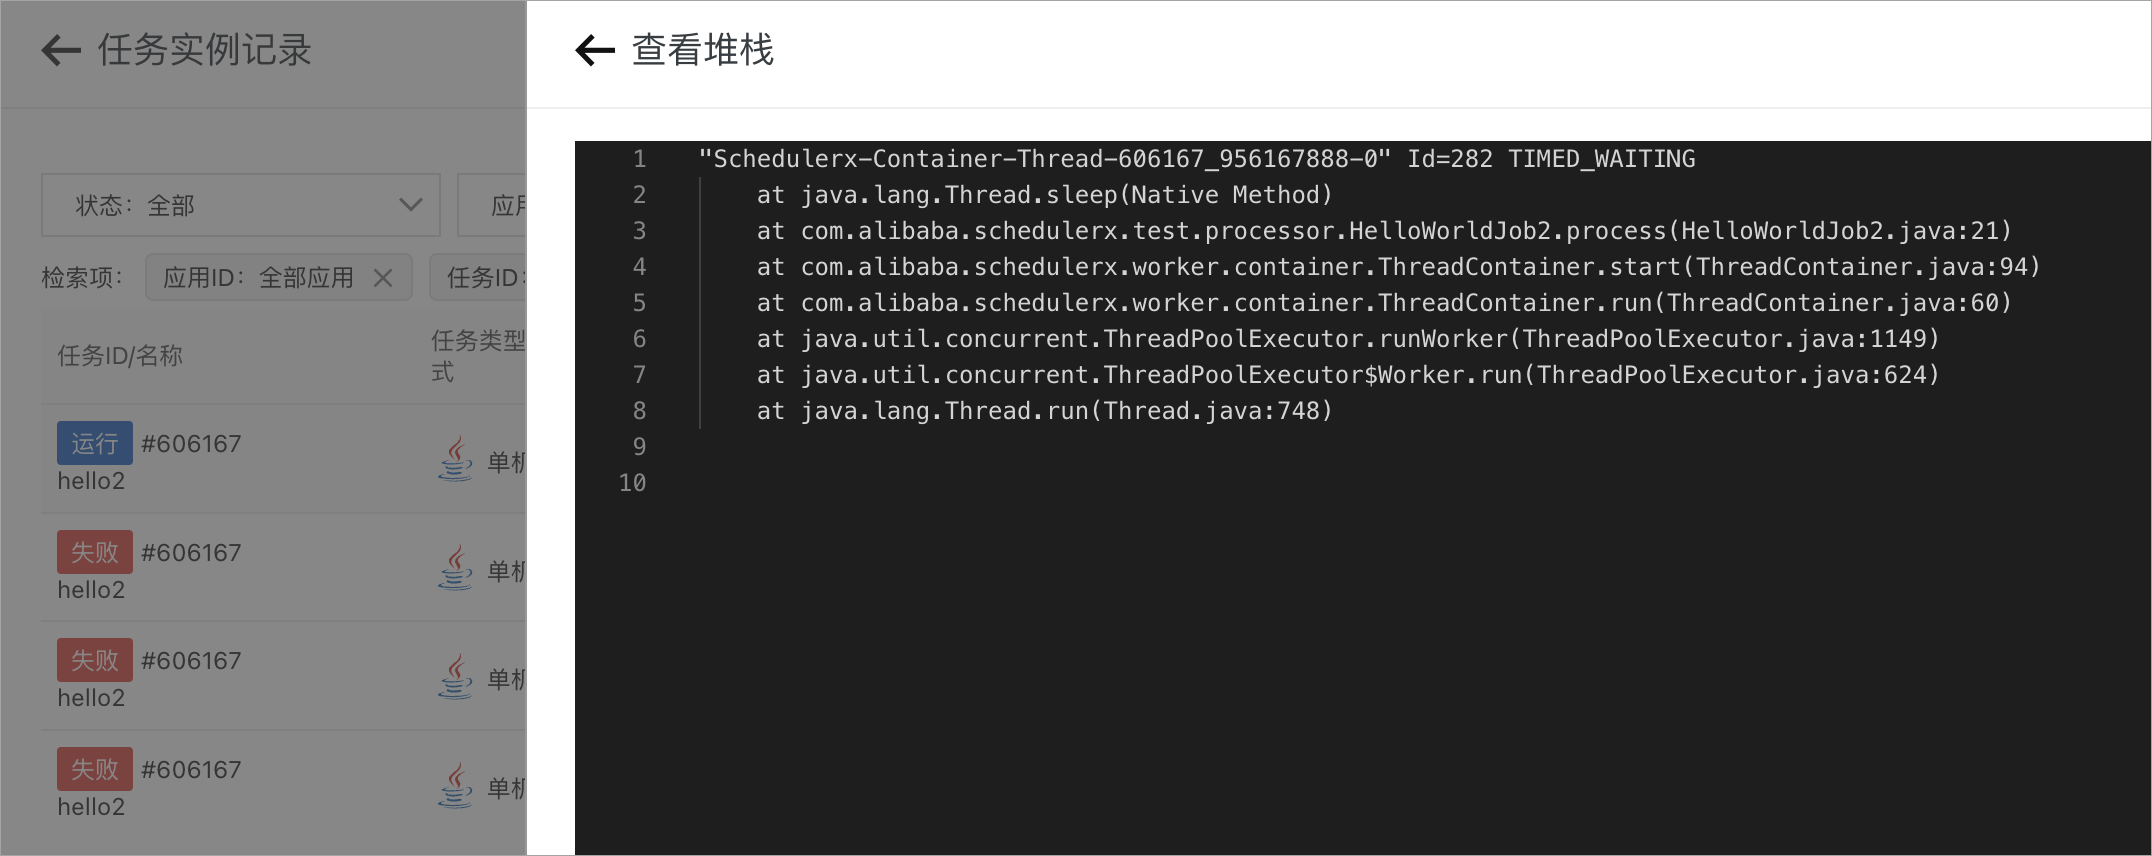
- 查看任務運行堆棧
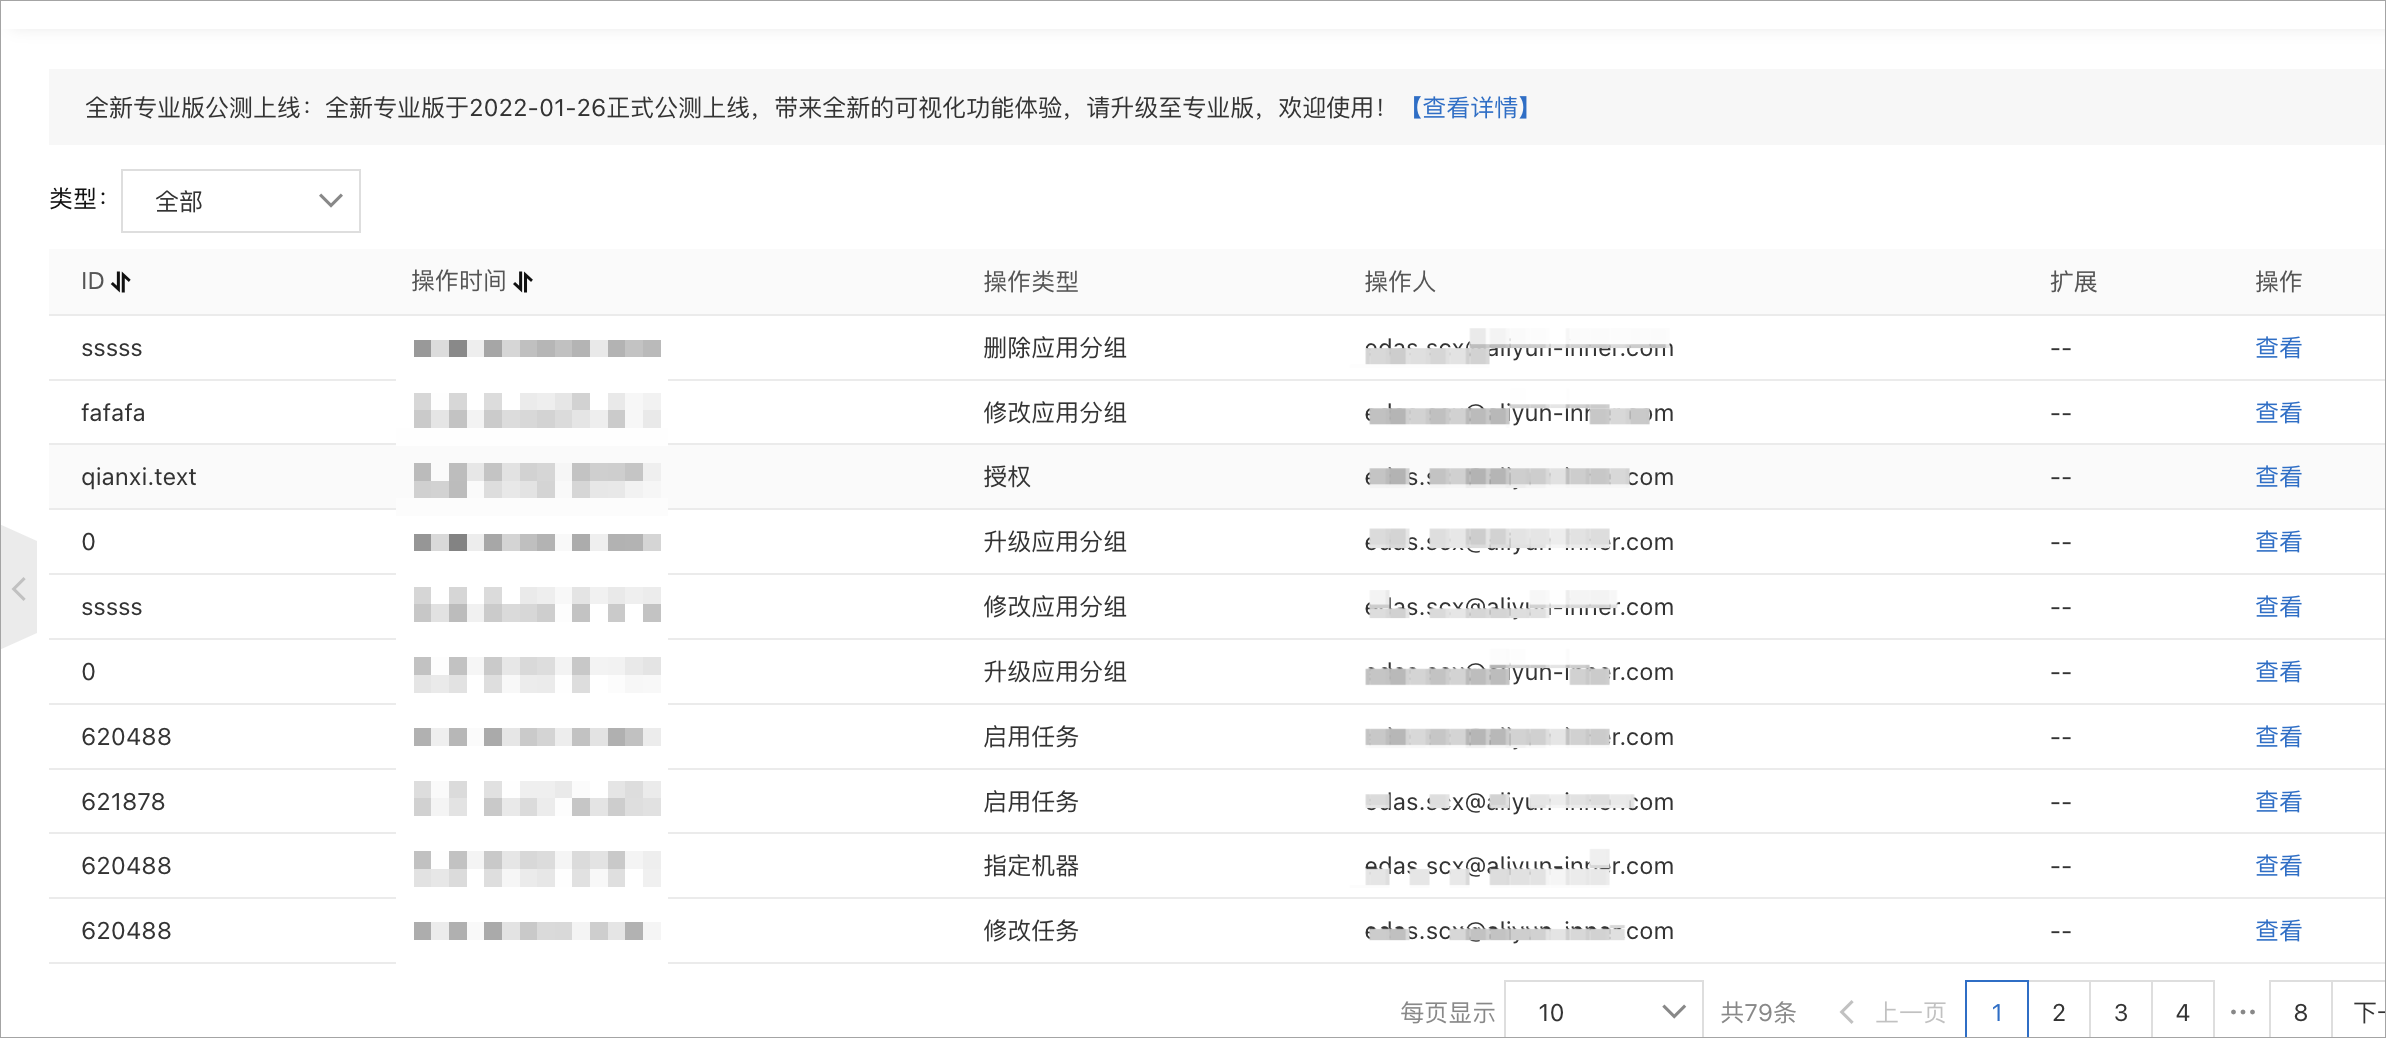
- 查看任務操作記錄
高級特性
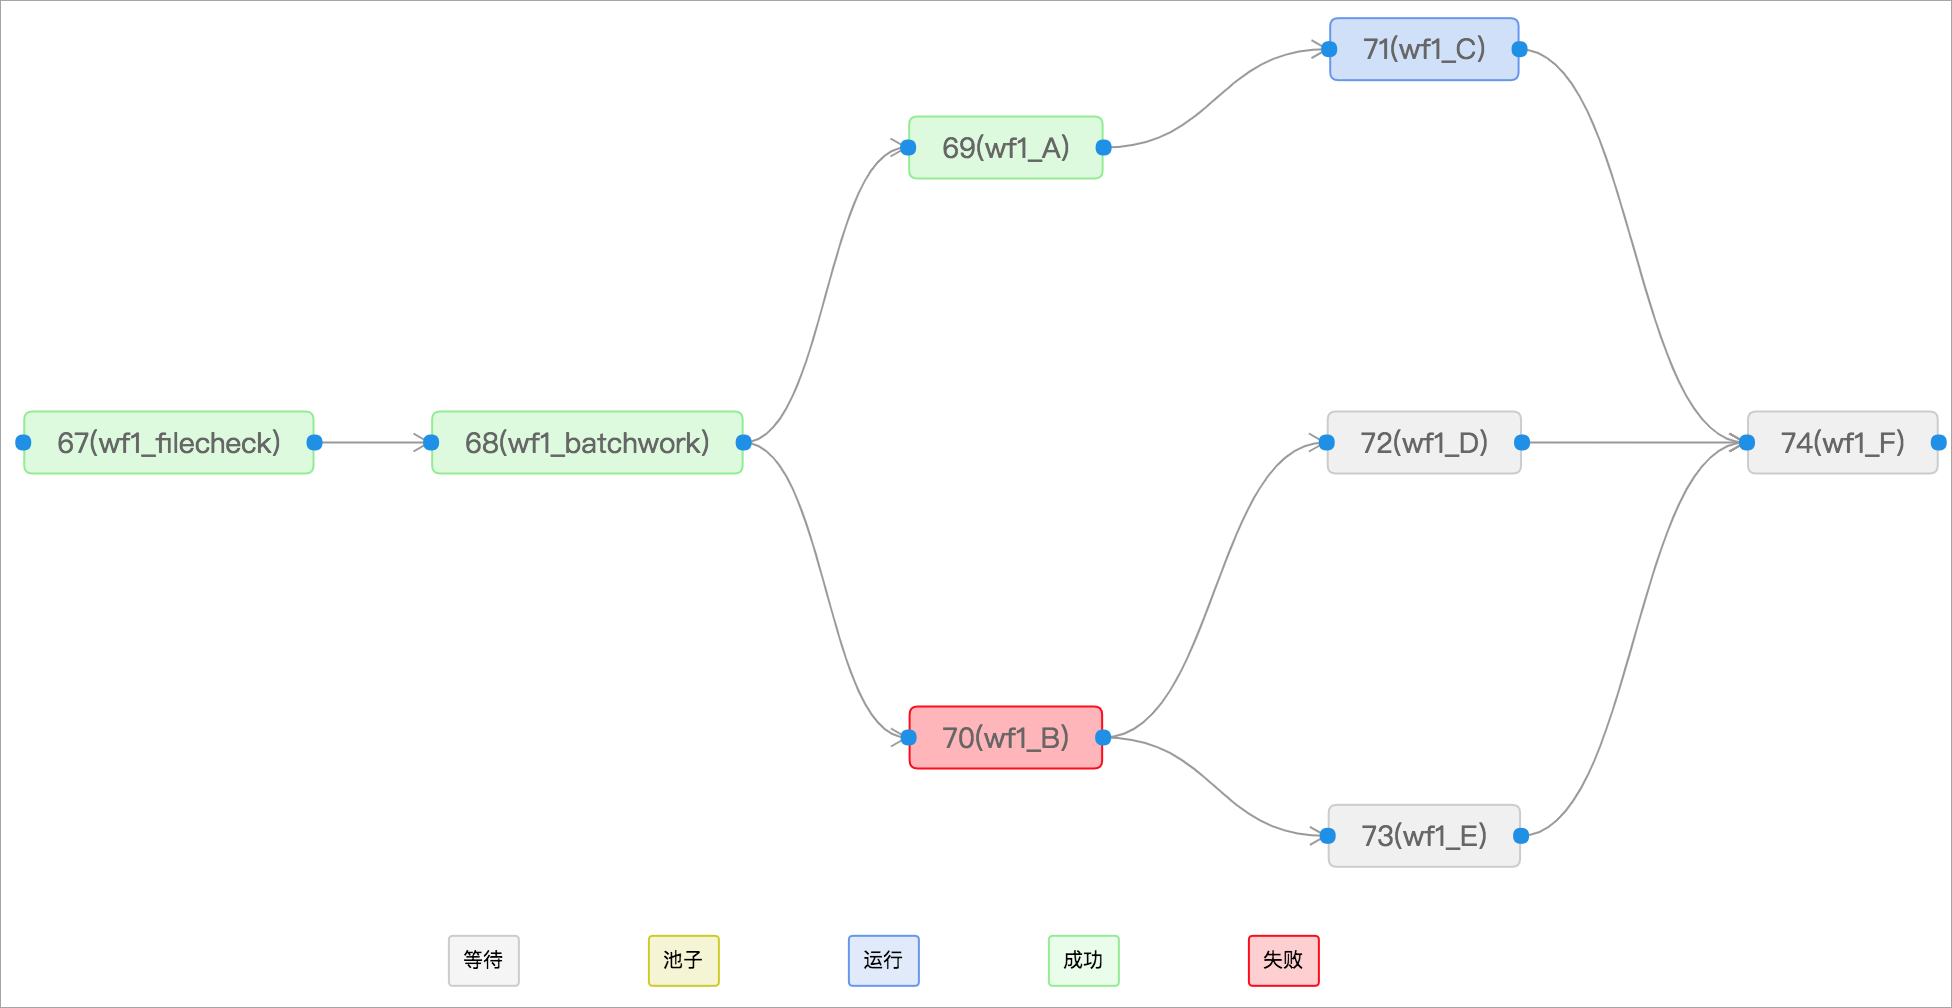
- 任務編排支持工作流(DAG)進行任務編排,可通過拖拽對前端進行操作。詳細的任務狀態圖方便您一目了然地看到下游任務為什么沒有執行。
- 限流
常見場景是夜間離線報表業務,比如很多報表任務是凌晨1點或者2點開始,要控制應用最大并發的任務數量(否則業務無法支撐),達到并發上限的任務會在隊列中等待。同時要求早上9點前必須完成KPI報表,可以設置KPI任務高優先級,會搶占低優先級任務優先調度。
SchedulerX 2. 0支持可搶占的任務優先級隊列,只需要在控制臺進行配置即可。

- 資源隔離
支持命名空間和應用級別資源隔離,支持多租戶權限管理。
商業化報警運維
- 報警
支持通過郵件、釘釘、短信或電話進行任務執行失敗、超時和無可用機器報警通知。
- 運維操作
支持原地程序運行、重刷數據、標記成功、查看堆棧、停止任務和指定機器等。
免運維、低成本
ElasticJob依賴ZooKeeper作為任務存儲和任務調度協調,至少需要3個節點的ZooKeeper。如果有節點發生故障,需要重新配置ZooKeeper的服務端和客戶端的配置,可能需要重啟所有的應用。同時,受ZooKeeper功能限制,如果任務量級比較大,一個ZooKeeper集群將無法支撐住,且ZooKeeper無法水平擴展支持更大的TPS,就需要維護多個ZooKeeper集群,這樣會增加機器成本。
通過SchedulerX 2.0托管ElasticJob任務,您不需要自己維護ZooKeeper集群,也不需要關注任務量級的增長,節省了機器和人力的維護成本。
高可用
SchedulerX 2.0采用高可用架構,任務多備份機制,經歷阿里集團多年雙十一、容災演練,可以做到整個集群任意2個節點發生故障或者任意一個機房斷電,任務調度都不會受到影響。
與開源ElasticJob的區別
| 對比項 | 開源ElasticJob | SchedulerX為底座的ElasticJob任務 |
| Simple任務 | 支持 | 支持 |
| Script任務 | 支持 | 支持 |
| Dataflow任務 | 支持 | 支持 |
| 單機 | 支持 | 支持 |
| 分片廣播 | 支持 | 支持 |
| 定時 | cron | cron、fixed_rate、fixed_delay、one_time |
| 工作流 | 不支持 | 支持 |
| 可視化 | 無 | 歷史記錄、日志服務、運行堆棧、操作記錄、用戶大盤等 |
| 監控報警 | 郵件 | 郵件、釘釘群、短信、電話 |
| 運維操作 | 無 | 運行一次、原地重跑、重刷數據、標記成功、停止運行 |
Spring Boot接入方法
以ElasticJob-3.0.1版本為例,更多信息,請參見Demo工程。
- pom.xml文件增加schedulerx2-plugin-elasticjob插件,刪除elasticjob-simple-executor和elasticjob-dataflow-executor,刪除后如下所示:
<!-- elasticjob --> <dependency> <groupId>org.apache.shardingsphere.elasticjob</groupId> <artifactId>elasticjob-lite-spring-boot-starter</artifactId> <version>3.0.1</version> <exclusions> <exclusion> <groupId>org.apache.shardingsphere.elasticjob</groupId> <artifactId>elasticjob-simple-executor</artifactId> </exclusion> <exclusion> <groupId>org.springframework.boot</groupId> <artifactId>spring-boot-starter-logging</artifactId> </exclusion> <exclusion> <groupId>org.apache.shardingsphere.elasticjob</groupId> <artifactId>elasticjob-dataflow-executor</artifactId> </exclusion> </exclusions> </dependency> <dependency> <groupId>com.aliyun.schedulerx</groupId> <artifactId>schedulerx2-plugin-elasticjob</artifactId> <version>3.0.1.3</version> </dependency> - 在SchedulerX控制臺創建您的命名空間和應用。具體操作,請參見創建命名空間和應用管理。
- 修改application.yml原有的ElasticJob配置。
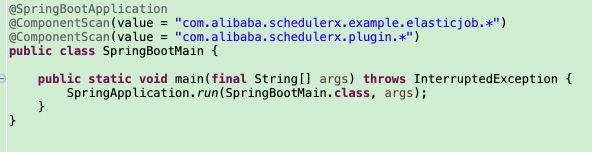
elasticjob: regCenter: serverLists: localhost:2181 namespace: elasticjob-springboot-demo schedulerx: #這里需要增加一個"schedulerx:",則如下任務會自動同步到SchedulerX控制臺。 jobs: simpleJob: elasticJobClass: com.alibaba.schedulerx.example.elasticjob.job.MySimpleJob cron: 0/30 * * * * ? shardingTotalCount: 1 overwrite: true shardingJob: elasticJobClass: com.alibaba.schedulerx.example.elasticjob.job.MyShardingJob cron: 0 * * * * ? shardingTotalCount: 3 shardingItemParameters: 0=Beijing,1=Shanghai,2=Guangzhou overwrite: true dataflowJob: elasticJobClass: com.alibaba.schedulerx.example.elasticjob.job.MyDataFlowJob cron: 0 * * * * ? shardingTotalCount: 3 shardingItemParameters: 0=Beijing,1=Shanghai,2=Guangzhou props.streaming.process: true #開啟流式處理。 overwrite: true #增加如下SchedulerX的配置。具體操作,請參見Spring Boot應用接入SchedulerX。 spring: schedulerx2: endpoint: acm.aliyun.com namespace: 433d8b23-xxxx-xxxx-xxxx-90d4d1b9a4af groupId: elasticjob-test appKey: xxxxxxxxxxx regionId: public aliyunAccessKey: xxxxxxxxxxxx aliyunSecretKey: xxxxxxxxxxxx - 啟動程序增加自動掃描com.alibaba.schedulerx.plugin.*。
- 配置日志服務,搜集客戶端的日志。使用log4j2配置log4j2.xml。具體操作,請參見阿里巴巴任務調度SchedulerX支持日志服務。
<?xml version="1.0" encoding="UTF-8"?> <Configuration status="off"> <Appenders> <Console name="Console" target="SYSTEM_OUT"> <PatternLayout pattern="%d{yyyy-MM-dd HH:mm:ss.SSS} [%t] %-5level %logger{36} - %m%n" /> </Console> <SchedulerxLog4j2Appender name="schedulerxLog" timeFormat="yyyy-MM-dd'T'HH:mmZ" timeZone="UTC" ignoreExceptions="true"> <PatternLayout pattern="%d %-5level [%thread] %logger{0}: %msg"/> </SchedulerxLog4j2Appender> </Appenders> <Loggers> <Root level="info"> <AppenderRef ref="Console" /> </Root> <Logger name="schedulerx" level="info" additivity="false"> <AppenderRef ref="schedulerxLog" /> </Logger> </Loggers> </Configuration> - (可選)如果您需要采集業務日志,可以使用原生log4j2/logback打印日志。無需修改任務實現邏輯。
@Component public class MySimpleJob implements SimpleJob { private static final Logger LOGGER = LogManager.getLogger("schedulerx"); @Autowired private HelloService helloService; @Override public void execute(ShardingContext context) { LOGGER.info("jobName:" + context.getJobName() + ", hello:" + helloService.hello()); } } - 啟動程序,SchedulerX控制臺將自動同步任務。重要
- 其中調度頻率為秒級別,時間類型會改為second_delay。
- 分片個數大于1時,執行方式為分片運行,否則是單機運行。
通過控制臺可以看到任務的運行日志。